That’s a clear sign your Ninja coffee machine needs a good cleaning. Just like any other kitchen appliance, your coffee maker builds up mineral deposits, coffee oils, and bacteria over time. If you don’t clean it regularly, it won’t just affect the taste of your coffee—it could even shorten your machine’s lifespan.
But don’t worry! Keeping your Ninja coffee bar in top shape is easier than you think. This guide will walk you through the step-by-step process of daily, weekly, and deep cleaning routines, so your machine stays fresh, efficient, and delivers that barista-level coffee every morning.
Understanding Your Ninja Coffee Machine
Before we dive into the cleaning process, let’s take a moment to understand your Ninja Coffee Maker. This will help you know which parts need regular maintenance and why.
A Ninja coffee machine consists of several essential components:
- Water Reservoir: The container where you pour water before brewing. Over time, it collects calcium buildup, which can affect water flow.
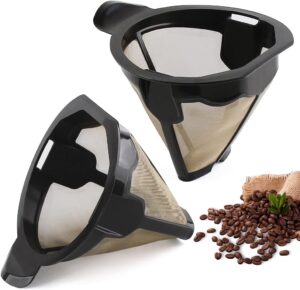
- Brew Basket & Permanent Filter: This is where your ground coffee sits. Coffee oils and old grounds can get trapped, leading to bad-tasting brews.
- Carafe: Whether glass or thermal, it needs regular cleaning to prevent coffee stains and residue buildup.
- Heating Plate: If you have a glass carafe, the heating plate underneath can collect burnt coffee stains over time.
- Drip Stop Lever: This controls the flow of coffee, and if it gets clogged, you’ll notice slow or incomplete brewing cycles.
Each of these parts requires a different level of maintenance, so let’s break it down into daily, weekly, and deep-cleaning steps.
Daily Cleaning Routine: Keep It Fresh Every Day
You wouldn’t leave yesterday’s coffee sitting in the pot, right? Well, your machine needs the same care. A quick daily clean ensures your coffee stays fresh and free from lingering flavors.
1. Clean the Brew Basket and Permanent Filter
- After each brew, remove the brew basket and dump out the used coffee grounds.
- If you use a permanent filter, rinse it under warm water to remove excess oils and residue.
- If you use paper filters, discard them immediately to avoid mold and bacteria buildup.
2. Rinse the Carafe and Water Reservoir
- Wash the carafe with warm, soapy water after each use. Let it air dry to prevent moisture buildup.
- Empty the water reservoir if you don’t plan to use the machine for a while. Stagnant water can lead to bacteria and mineral deposits forming inside.
3. Wipe Down the Machine Exterior
- Use a damp cloth to clean the outside of your Ninja coffee bar, especially around the control panel and drip stop lever.
- Coffee drips can cause staining if left for too long, so wipe them off after every use.
Spending just a couple of minutes a day on these simple tasks will keep your machine fresh and ready for the next brew.
Weekly Cleaning Tasks: Go Beyond the Basics
Daily cleaning is great, but some areas need extra attention at least once a week. A deeper clean will help prevent the buildup of coffee oils, limescale, and bacteria inside your machine.
1. Deep Clean the Carafe
Even with daily rinsing, your carafe will eventually develop coffee stains. To get rid of them:
- Fill the carafe with warm water and a few tablespoons of baking soda.
- Let it sit for 15 minutes, then scrub with a sponge or bottle brush.
- Rinse thoroughly to remove all residue.
Alternatively, you can fill the carafe with equal parts vinegar and water, let it soak, and then wash it out.
2. Inspect and Clean the Water Reservoir
Hard water minerals can build up in the water reservoir, affecting your machine’s performance.
- Remove the reservoir and scrub it with a soft brush or sponge.
- Rinse it thoroughly and let it air dry before putting it back in place.
If you notice white or chalky residue inside, that’s a sign of mineral deposits. You’ll need to descale your machine, which we’ll cover in the next section.
3. Clean the Brew Basket and Drip Stop Mechanism
Even though you rinse the brew basket daily, a deeper clean helps remove trapped coffee oils.
- Soak the brew basket in warm, soapy water once a week.
- If you notice coffee dripping too slowly, check the drip stop lever for any clogs. You can clean it using a toothpick or small brush to remove buildup.
These small steps will keep your Ninja coffee maker running smoothly and ensure every cup tastes as fresh as the first.
Monthly Maintenance and Descaling: Deep Cleaning for Peak Performance
Even if you rinse your Ninja Coffee Maker regularly, mineral buildup from hard water can slowly accumulate inside the machine. Over time, this can affect the water flow, reduce brewing efficiency, and even cause a “clean” light indicator to turn on.
That’s where descaling comes in. This deep-cleaning process removes limescale, calcium deposits, and other residue that daily cleaning can’t reach.
If your coffee has started tasting off, or you’ve noticed slower brewing times, it’s time to deep clean your Ninja Coffee Machine.
See more: Effortlessly Clean and Descale a Keurig Mini
Why Descaling is Important
When water heats up inside your coffee maker, it leaves behind trace minerals that don’t fully dissolve. These deposits can:
- Block water flow, making your coffee brew slower.
- Reduce heating efficiency, so your coffee isn’t as hot as it should be.
- Affect coffee taste, giving it a bitter or metallic flavor.
- Trigger maintenance alerts, like the Ninja’s “Clean” cycle light staying on.
To avoid these issues, aim to descale your Ninja Coffee Maker once a month, especially if you live in an area with hard water.
Step-by-Step Descaling Process
Descaling sounds technical, but it’s actually super simple. You just need a descaling solution, either store-bought or a homemade mix of vinegar and water.
Option 1: Using a Commercial Descaling Solution
Most brands sell descaling solutions specifically designed for coffee makers. These solutions effectively break down calcium deposits without leaving behind strong odors.
- Fill the Water Reservoir
- Pour the descaling solution into the water tank, following the product instructions.
- Fill the rest of the reservoir with fresh water.
- Run the Cleaning Cycle
- Press the “Clean” button or run a full brew cycle without coffee grounds.
- Let the solution flow through the entire system, removing buildup inside the tubes and heating elements.
- Rinse Thoroughly
- Once the cycle is complete, rinse the reservoir and refill it with clean water.
- Run 2-3 cycles with only water to flush out any remaining solution.
Option 2: Using Vinegar and Water (DIY Solution)
If you prefer a natural alternative, white vinegar is an excellent descaling agent.
- Mix a Cleaning Solution
- Combine equal parts white vinegar and water (for example, 50% vinegar, 50% water).
- Fill the Water Reservoir
- Pour the vinegar-water mixture into the reservoir.
- Run the Cleaning Cycle
- Start a full brew cycle without coffee grounds.
- Halfway through, pause the machine for 30 minutes. This allows the vinegar to break down deposits inside the tubes.
- Complete the Brew and Rinse Well
- Resume the cycle and let it finish.
- Rinse the reservoir and run two full brewing cycles with only water to remove any vinegar taste.
After descaling, your Ninja Coffee Bar should be running like new, with improved flow and better-tasting coffee.
Tips for Maintaining Optimal Performance
Want to keep your Ninja Coffee Maker in top shape? Follow these extra maintenance tips.
1. Use Filtered Water
Hard water causes limescale buildup faster than anything else. If possible, use filtered water to reduce mineral deposits and extend the time between descaling cycles.
2. Replace the Water Filter (If Applicable)
Some Ninja coffee makers have a built-in water filter. If yours does, make sure to replace it every 3 months to keep your coffee tasting fresh.
3. Store Your Machine Properly
If you don’t use your coffee maker every day, store it in a dry, cool place. Avoid leaving stagnant water in the reservoir, as this can lead to mold growth.
4. Check for Leaks and Clogs
If you notice your Ninja Coffee Machine dripping slowly or leaking, check the drip stop mechanism and brew basket for coffee ground buildup. A quick rinse can prevent blockages.
Troubleshooting Common Issues
Even with regular cleaning, you might still run into problems. Here’s how to fix the most common ones.
1. The “Clean” Light Won’t Turn Off
- The machine still detects mineral buildup.
- Run another descaling cycle to remove any remaining deposits.
2. Coffee Tastes Bitter or Burnt
- Old coffee oils might be stuck in the brew basket or carafe.
- Do a deep clean using baking soda or vinegar.
3. Machine is Brewing Too Slowly
- The water lines may be partially clogged.
- Descale the machine using a vinegar-water solution to restore proper water flow.
4. Coffee is Not Hot Enough
- Hard water buildup on the heating element can cause lower temperatures.
- Run a deep cleaning cycle and always preheat the carafe with hot water before brewing.
Final Thoughts: Keep Your Ninja Coffee Maker in Top Shape
Cleaning your Ninja Coffee Machine might not be the most exciting task, but it’s essential if you want consistently great coffee.
By following this guide, you’ll:
✅ Extend your machine’s lifespan
✅ Improve brewing efficiency
✅ Keep your coffee tasting fresh
A little maintenance goes a long way. So, the next time you take a sip of your morning coffee, you’ll know it’s coming from a machine that’s clean, efficient, and ready to brew the perfect cup.
I’m Jeff Olson, and I love coffee. In fact, I’m something of a professional about coffee. I own and operate coffeemachinenes.com, one of the web’s top resources for everything coffee-related. I’m also an avid home barista, and enjoy experimenting with different brewing methods and flavor profiles. When I’m not nerding out about all things coffee, you can find me playing guitar or spending time with my wife and kids.