If you’re a coffee lover, chances are Clean and Descale a Keurig Mini is your best friend.
There’s nothing like the convenience of a single-serve coffee maker delivering a fresh cup in seconds.
But here’s the catch: If you don’t clean and descale your Keurig Mini regularly, it won’t just affect the taste of your coffee—it could also shorten your machine’s lifespan.
Ever noticed your Keurig Mini brewing slower than usual? Or maybe your coffee has a weird taste?
That’s probably because of mineral buildup and coffee residue inside the machine.
In this guide, we’ll walk you through a step-by-step process to clean and descale a Keurig Mini, ensuring your coffee always tastes fresh and your machine stays in top shape.
Why Cleaning and Descaling Your Keurig Mini is Essential
Your Keurig Mini works hard to give you that perfect cup of coffee every day.
But over time, mineral deposits from water (especially if you use tap water) and leftover coffee oils build up inside the machine.
This can lead to:
- Slow brewing times – Your coffee takes forever to come out.
- Strange-tasting coffee – It doesn’t taste as fresh as it should.
- Machine clogs and blockages – This could lead to your Keurig Mini not brewing at all.
- Reduced lifespan of your Keurig Mini – A dirty machine won’t last as long.
If you want to keep your Keurig Mini working efficiently and brewing great coffee, regular cleaning and descaling are a must.
Signs Your Keurig Mini Needs Cleaning and Descaling

How do you know when it’s time to give your machine a deep clean?
Here are some telltale signs:
1. Your coffee doesn’t taste the same
If your morning coffee tastes bitter or off, it’s probably due to old coffee residue in the machine.
2. It takes longer to brew
A slow brewing cycle usually means there’s a buildup of limescale (mineral deposits) inside the machine.
3. Your Keurig Mini is making weird noises
Gurgling or sputtering sounds can indicate clogged water lines or dirty needles.
4. Indicator light turns on (for newer models)
Some Keurig Mini models have a descale light that tells you it’s time for maintenance.
If you notice any of these signs, don’t ignore them!
It’s time to clean and descale your Keurig Mini.
What You Need to Clean and Descale a Keurig Mini
Before we get started, make sure you have the right supplies.
Cleaning Supplies:
- A soft, damp cloth (for wiping the machine)
- Mild dish soap
- Warm water
- A small brush or toothbrush (to clean tight spots)
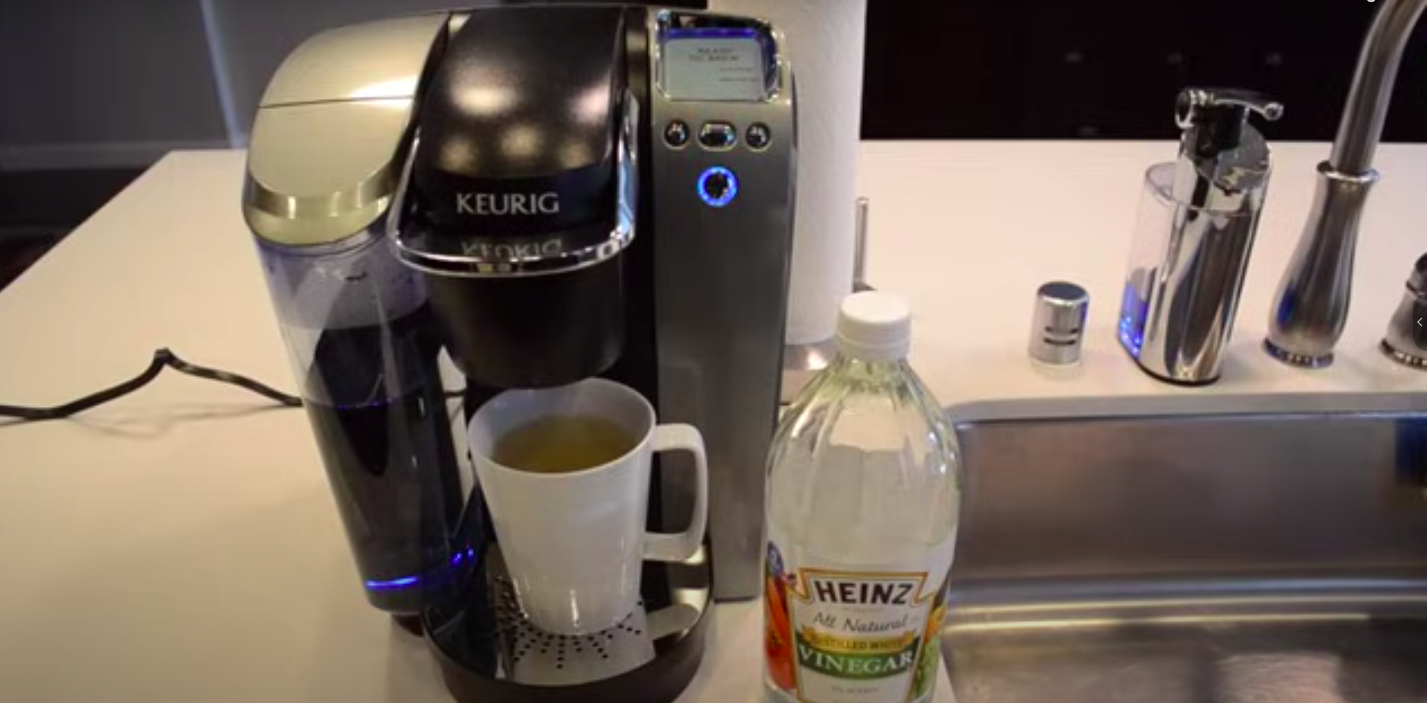
Descaling Supplies (Choose One):
- Keurig Descaling Solution (Recommended)
- White vinegar (A natural alternative)
- Lemon juice or citric acid (Another natural option)
A paperclip or needle will also be helpful for cleaning the K-Cup needle, which often gets clogged with coffee grounds.
Step-by-Step Guide to Cleaning Your Keurig Mini
Discover step-by-step instructions to effectively clean and descale your Keurig Mini, ensuring perfect brews every time.
Step 1: Unplug and Disassemble Your Keurig Mini
Safety first! Before cleaning, turn off and unplug your Keurig Mini.
Next, remove all the detachable parts:
- Drip tray
- Water reservoir (if your model has one)
- K-Cup holder
Wash these parts with warm, soapy water and let them air dry.
Step 2: Wipe Down the Exterior
Your Keurig Mini probably gets splashed with coffee now and then.
Use a soft, damp cloth to wipe down the outside of the machine.
For stubborn stains, add a little dish soap to the cloth, then wipe again with a clean, damp cloth.
Step 3: Clean the K-Cup Holder and Needle
The K-Cup holder is where all the coffee action happens, so it gets dirty fast.
- Take out the K-Cup holder and rinse it under warm water.
- Use a toothbrush or small brush to scrub away any coffee residue.
Cleaning the Needle
A clogged needle can stop your Keurig Mini from brewing properly.
- Use a paperclip or needle to gently clean out the entrance and exit needles.
- Move the paperclip around to loosen any coffee grounds stuck inside.
This step is crucial if you want your Keurig Mini to brew smoothly.
See more: Effective Keurig Descaling with Vinegar: A Step-by-Step Guide
How to Descale Your Keurig Mini
Now that your machine is clean, it’s time for descaling.
Descaling removes limescale buildup that can block water flow and affect brewing temperature.
Step 1: Prepare the Descaling Solution
Choose your descaling method:
- Keurig Descaling Solution – Mix with water as per instructions.
- White Vinegar – Fill the reservoir with half vinegar, half water.
- Lemon Juice or Citric Acid – Mix with water for a natural alternative.
Step 2: Run the Descaling Cycle
- Fill the water reservoir with your descaling solution.
- Start a brew cycle without inserting a K-Cup.
- Let the solution run through the machine until the reservoir is empty.
This process breaks down mineral deposits and flushes them out of your Keurig Mini.
Step 3: Let the Descaling Solution Sit
After running the first descaling cycle, don’t rush to rinse the machine just yet.
Let the solution sit inside your Keurig Mini for about 30 minutes.
Why?
This extra time helps break down stubborn limescale deposits that might still be clinging to the inner components.
If you’ve never descaled your machine before, this step is especially important.
During this time, you can wipe down the drip tray, exterior, and water reservoir again for a final clean.
Step 4: Rinse the Machine Thoroughly
Once the descaling solution has done its job, it’s time to rinse out any remaining residue.
- Empty the water reservoir and rinse it thoroughly.
- Fill it with fresh, clean water (preferably filtered or bottled water).
- Run several brew cycles without a K-Cup until the water reservoir is completely empty.
This step ensures no vinegar or descaling solution taste remains in your next cup of coffee.
If you still notice a strange taste, repeat the rinse process one more time.
Preventing Future Buildup in Your Keurig Mini
Now that your Keurig Mini is sparkling clean, let’s talk about keeping it that way.
A little regular maintenance goes a long way in preventing mineral deposits, clogs, and strange-tasting coffee.
1. Use Filtered or Bottled Water
Tap water is full of minerals that cause limescale buildup.
Using filtered or bottled water can significantly reduce the amount of scale that forms inside your machine.
2. Empty and Rinse the Water Reservoir Regularly
If you’re not using your Keurig Mini daily, don’t leave stagnant water sitting inside the machine.
Empty and rinse the water reservoir at least once a week to prevent bacteria growth.
3. Clean the Needle Frequently
A clogged needle is a common reason why Keurig Mini machines stop brewing properly.
Using a paperclip or cleaning tool every couple of weeks keeps the needle clear of coffee grounds.
4. Wipe Down the Exterior Weekly
Coffee splashes, dust, and fingerprints make your machine look dirty over time.
A quick wipe with a damp cloth once a week keeps your Keurig Mini looking fresh.
5. Stick to a Regular Descaling Schedule
To prevent mineral buildup, descale your Keurig Mini every three months (or more often if you have hard water).
Regular descaling improves performance and extends the life of your coffee maker.
Troubleshooting Common Keurig Mini Issues
Even with regular maintenance, your Keurig Mini might occasionally run into problems.
Here are some quick fixes for common issues.
1. Keurig Mini Not Brewing?
- Check the water reservoir – Make sure there’s enough water.
- Clean the needle – A clogged needle can block water flow.
- Restart the machine – Unplug it for a few minutes and plug it back in.
2. Coffee Tastes Off?
- Run a rinse cycle – Brew hot water without a K-Cup to clear any leftover flavors.
- Use fresh water – Old or unfiltered water can affect taste.
- Check the K-Cup freshness – Stale coffee can also impact flavor.
3. Keurig Mini Making Loud Noises?
- Check for mineral buildup – If it hasn’t been descaled in a while, it might be struggling to pump water.
- Ensure the machine is on a flat surface – Uneven surfaces can cause extra vibrations.
Final Thoughts
Cleaning and descaling your Keurig Mini isn’t just about better-tasting coffee—it’s about keeping your machine in top condition for years to come.
By following these simple steps and sticking to a regular maintenance schedule, you’ll:
✅ Enjoy consistently great coffee
✅ Prevent annoying brewing issues
✅ Extend the lifespan of your Keurig Mini
So next time you notice your coffee tasting a little off or your machine taking longer to brew, don’t wait—give your Keurig Mini the deep clean it deserves!
I’m Jeff Olson, and I love coffee. In fact, I’m something of a professional about coffee. I own and operate coffeemachinenes.com, one of the web’s top resources for everything coffee-related. I’m also an avid home barista, and enjoy experimenting with different brewing methods and flavor profiles. When I’m not nerding out about all things coffee, you can find me playing guitar or spending time with my wife and kids.